
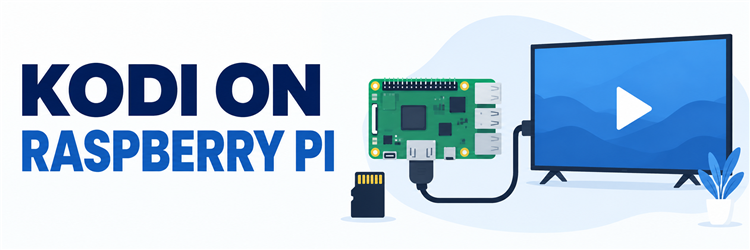
Key Takeaway: For a Raspberry Pi 5, choose the current LibreELEC image that explicitly names the Pi 5. A Pi 4 or 400 can use LibreELEC or OSMC; OSMC’s current downloads do not list a Pi 5 image. Write the correct image to a microSD card, boot with a suitable power supply and HDMI cable, then add media you own or are authorized to access. Kodi itself supplies no films or subscriptions.
Kodi on Raspberry Pi can turn a small board into a television-first player for your own video, music, and photographs. The confusing part is not Kodi’s interface: it is choosing an image that actually supports your Pi model, writing it to the right storage device, and knowing what streaming services may not do.
I checked the current LibreELEC and OSMC download pages against Raspberry Pi hardware documentation and Kodi’s media and remote-control guidance. This is a documentation-based setup guide, not a claim of hands-on benchmarks. Start with the board and image matrix below; it prevents the common mistake of following a Pi 4 tutorial on a Pi 5.
Install Kodi on Raspberry Pi With LibreELEC
LibreELEC is a small operating system built to launch Kodi. Its current Raspberry Pi downloads list separate images for Pi 5, Pi 4/400/CM4, and Pi 2/3. The page identifies LibreELEC 12.2 with Kodi 21.3 as its stable line; confirm the newest stable image on that page when you install. Writing an image erases the selected card, so check the device name and capacity twice.
- Identify your board: Read the model printed on your Pi or shown in its current system information; a Pi 5 needs the Pi 5 image, not the Pi 4 image.
- Prepare the card: Back up anything on a reliable microSD card and connect it to your computer through a card reader; imaging will replace its existing contents.
- Choose the image: Use the LibreELEC USB-SD Creator’s matching Raspberry Pi entry, or download the matching stable image from the official board-specific page.
- Write and verify: Select the correct removable card in the creator, write the image, wait for completion, and safely eject it before moving it to the Pi.
- Connect and boot: Insert the card, attach HDMI, networking and input, then connect the model-appropriate power supply last; follow the first-run language and network prompts.
Pick the Right Image for Your Board
The image filename matters more than a generic claim that “Kodi supports Raspberry Pi.” LibreELEC publishes separate builds by hardware family. OSMC’s download page lists Pi 1, 2, 3, 3+, 4/400 and Zero families, but not Pi 5. A Pi 5 owner should not flash an OSMC Pi 4 image and expect it to become compatible.
| Raspberry Pi model | Current documented route | Practical choice |
|---|---|---|
| Pi 5 | LibreELEC Pi 5 image | OSMC does not list a Pi 5 download |
| Pi 4 / 400 | LibreELEC Pi 4 family or OSMC Pi 4/400 | Choose by preferred system and update approach |
| Pi 3 / 3+ | LibreELEC Pi 2/3 family or OSMC Pi 2/3 family | Keep expectations modest for demanding media |
| Pi 2 | Listed by both projects | Check the exact revision and current image notes |
| Pi 1 / original Zero | OSMC lists legacy images; LibreELEC’s current stable list does not | Avoid assuming a current Kodi release is available |
- Prefer explicit support: Download from the maintainer’s model list, because board-specific boot files, kernels, and user space may differ even when cases look similar.
- Check release labels: A download page may display archived versions below the stable line; choose a current stable image unless a documented reason requires older software.
- Understand Pi 400: Both projects group it with Pi 4 hardware for imaging, but its integrated keyboard changes the physical living-room arrangement.
- Treat old boards separately: An available historical image is not proof of current security updates, Kodi add-on compatibility, or smooth high-resolution playback.
- Do not cross-flash: If your model is missing from a project’s current list, use an explicitly supported option instead of experimenting with another board’s image.
Use OSMC on a Supported Pi
OSMC is another Kodi-based operating system, with its own installer, settings area, and update path. Its Pi 4/400 and Pi 2/3 family downloads carry newer releases than the legacy Pi 1/Zero line. Select your exact supported family in the installer; OSMC’s own installation page says the installer creates bootable media and can configure networking in the process. The steps below apply only where an OSMC image is actually listed.
- Download the installer: Choose your computer’s operating system on OSMC’s official download page, then select the corresponding supported Pi family and current release.
- Choose installation media: Insert a backed-up microSD card, verify its identity in the installer, and recognize that the write operation deletes previous data.
- Set networking: OSMC permits wired or wireless details during installation; use Ethernet when available, or enter your own Wi-Fi credentials locally in the installer.
- Finish first boot: Safely eject the card, connect it to the supported Pi, attach television and power, then complete OSMC’s on-screen setup and updates.
- Keep systems distinct: Follow OSMC’s My OSMC menus for networking and updates; LibreELEC settings and file paths are not interchangeable with this distribution.
Prepare Power, HDMI, Cooling, and Storage
A flaky setup can look like a Kodi fault when it is actually power or storage. Raspberry Pi recommends a 27W USB-C supply for Pi 5 and a 3A USB-C supply for Pi 4/400; older models use different connectors and recommendations. Pi 4 and Pi 5 use micro-HDMI to HDMI for a typical television. Connect the main screen to HDMI0 and select the corresponding TV input before applying power.
| Part | Pi 5 | Pi 4 / 400 | Why it matters |
|---|---|---|---|
| Power | Recommended 27W USB-C supply | Recommended 3A USB-C supply | Undervoltage can cause resets or peripheral trouble |
| TV cable | Micro-HDMI to HDMI | Micro-HDMI to HDMI | Use the TV’s matching input and HDMI0 first |
| Boot storage | Reliable microSD card with matching image | Reliable microSD card with matching image | A worn or wrongly flashed card can prevent boot |
| Cooling | Suitable ventilated case or cooler for sustained loads | Ventilated case; consider cooling if heat is an issue | Temperature and placement affect sustained behavior |
| Network | Ethernet or configured Wi-Fi | Ethernet or configured Wi-Fi | Large NAS files are easier to diagnose on a stable link |
- Use the right supply: A phone charger that fits the USB-C socket may still deliver insufficient current when drives, wireless adapters, or other peripherals are attached.
- Start with HDMI0: Verify the micro-HDMI cable and TV input with the simplest connection before adding a receiver, splitter, or second screen.
- Keep the card healthy: Buy storage from a reliable seller, avoid interrupting writes, and keep a backup of a working system before major changes.
- Allow airflow: Put the board in a ventilated case rather than behind insulation or directly on top of a hot amplifier; monitor heat if it throttles.
- Isolate USB issues: If a bus-powered drive causes instability, test with it unplugged and use a powered hub where the hardware guidance recommends one.
Finish Kodi’s First-Run Settings
After boot, Kodi is an empty library, not a bundle of channels. Set your language, region, network, screen boundaries, and sound path before loading a large collection. Keep the default skin until playback is reliable. If the television crops menus, check its overscan or zoom mode first; changing Kodi’s calibration can hide rather than solve a display-chain problem.
- Complete network setup: Confirm a local IP address and internet access for metadata and updates; Ethernet also removes Wi-Fi variability when testing a NAS.
- Set regional options: In Kodi’s interface settings, choose the preferred language, time zone, date format, and keyboard layout for accurate library information.
- Check the picture: Let the TV use its native aspect ratio and disable overscan before adjusting Kodi’s GUI resolution or video calibration.
- Start with stereo audio: Confirm ordinary playback first; enable receiver passthrough and individual encoded formats only after you know the HDMI chain accepts them.
- Update conservatively: Apply stable distribution and Kodi updates through the distribution’s supported route, then retest one known file before changing add-ons or skins.
Add Movies and Music You Are Allowed to Play
Kodi can browse local USB storage and folders shared by a computer or NAS. For a conventional movie library, use Videos, Files, Add videos, choose the folder, then set its content type to Movies or TV shows. A properly named collection makes metadata matching easier. Kodi’s library guide covers scanning and source selection; test a small folder before importing everything.
- Begin locally: Play one owned file from an attached drive, confirming the Pi can decode it and the television accepts its audio and video signal.
- Prepare a share: Give the Pi read access to a specific media folder on your computer or NAS rather than broad access to unrelated personal files.
- Use modern SMB: Kodi’s SMB documentation requires version 2 or newer; do not weaken a network by enabling SMBv1 just for an old tutorial.
- Name files clearly: Separate movies and shows into sensible directories, choose the matching content type, and inspect a few metadata matches before a full scan.
- Keep credentials private: Enter any NAS username and password only on your own Kodi device; never place those values in a public troubleshooting screenshot.
Control Kodi From the Sofa
A USB keyboard is useful for entering Wi-Fi details, but it need not stay connected. Kodi’s CEC guidance explains how a compatible television can pass ordinary remote keys over HDMI to a Raspberry Pi. Brands often rename HDMI-CEC in TV menus, and receivers or switchers can affect the signal. A networked Kodi remote app or supported USB receiver offers another route.
- Try the TV remote: Enable HDMI-CEC on the television and Kodi input, then test directional, select, back, and play keys before buying another controller.
- Check the signal path: If CEC fails through an AV receiver or HDMI switch, connect the Pi directly to the TV to isolate the intermediary.
- Keep a keyboard nearby: A simple USB keyboard helps with the initial network share address, password entry, search, and recovery from a broken remote mapping.
- Use phone control carefully: Put the phone and Pi on the same trusted network and enable only the Kodi service controls required by your chosen remote app.
- Test before customizing: Verify navigation in the default skin before remapping buttons or installing a visually demanding interface on an older board.
Know the Codec and Streaming-Service Limits
The Pi 5 specification includes a 4K/60 HEVC decoder and dual 4K/60 HDMI output, but those specifications are not a promise that every file, HDR format, receiver, or service works in Kodi. Pi 4 capabilities, build settings, and file encodings differ. Test a representative owned file rather than inferring compatibility solely from resolution. Subscription streaming also depends on add-on maintenance, licensing, Widevine/DRM, and service policies that can change independently of the Pi.
- Separate output and decoding: A 4K HDMI mode does not guarantee hardware decoding for an arbitrary 4K codec, profile, bit depth, subtitle type, or container.
- Check the source file: Compare a known-good H.264 or HEVC sample with the problem file; note codec, audio track, bitrate, and subtitle format.
- Do not assume Netflix parity: A working Kodi add-on or Widevine component does not guarantee a service’s highest resolution, HDR, downloads, or long-term support.
- Prefer licensed sources: Kodi does not grant access rights. Use your own media and official, authorized add-ons; avoid repositories promising every premium channel for free.
- Test audio independently: When picture works but sound fails, revert passthrough to PCM/stereo before blaming the image, codec, or HDMI cable.
Diagnose a Pi That Will Not Boot or Play Smoothly
Change one variable at a time. A blank TV input, a failed boot, a disappearing network share, and a decoding problem require different fixes. First remove external drives, use a known-good power supply, and confirm the downloaded image names your board. Then play a local file before adding NAS traffic or an add-on. Reflashing should be a last resort after backing up the card and Kodi settings.
| Symptom | First check | Next step |
|---|---|---|
| No picture on first boot | TV input, HDMI0, cable, and power | Confirm the exact board image and re-image a known-good card |
| Random resets or USB dropouts | Recommended supply and disconnected peripherals | Try a powered hub and inspect power warnings |
| NAS folder unavailable | Server awake, IP address, and share permissions | Use SMBv2+ and test a small folder over Ethernet |
| Video stutters but menus work | Codec, bitrate, and local-versus-network test | Check cooling and network before changing display settings |
| TV remote does nothing | HDMI-CEC on TV and direct cable path | Try keyboard input and inspect Kodi peripheral settings |
- Resolve boot first: Confirm the correct image family and a healthy card before changing Kodi options, which cannot help a system that never starts.
- Remove power variables: Disconnect high-draw USB accessories and use the recommended supply; recurring low-voltage behavior can masquerade as software corruption.
- Compare local playback: If the same file plays locally but stalls from a NAS, investigate Wi-Fi, server load, or share settings before transcoding media.
- Keep a recovery copy: Back up settings and a working card image before major distribution upgrades, repository changes, or experiments with unsupported hardware.
- Collect useful diagnostics: Record board, distribution release, file codec, connection path, and exact symptom when asking a maintainer or community forum for help.
Should You Build This Instead of Using a Fire TV Stick?
The Pi makes sense when you enjoy configuring a dedicated local-media box, have a NAS or owned files, and want control over the software image. It is not an automatic replacement for a certified streaming stick: commercial apps, DRM levels, remote convenience, and updates follow different paths. If your priority is an app-store television experience, read our streaming-device comparison before buying parts.
- Choose Pi for owned libraries: Kodi’s organization, network shares, and flexible controls suit a household with files it can lawfully access.
- Choose certified apps for subscriptions: A commercial streaming device generally offers the provider’s approved application route and clearer support for its DRM-controlled catalog.
- Count the whole setup: Board, supply, storage, cable, case, cooling, and controller are separate requirements, even when the operating system itself is free.
- Allow maintenance time: A Pi installation gives you flexibility but also makes you responsible for imaging, backups, distribution updates, and component troubleshooting.
- Avoid universal claims: Neither platform is best for every household; the right choice depends on media rights, service needs, and tolerance for setup work.
Final Verdict
For a new Pi 5 media-center build, the documented route is the current LibreELEC Pi 5 image. On a Pi 4/400, LibreELEC and OSMC both publish matching downloads, so choose the workflow you prefer and keep to its own support instructions. Use a reliable card, proper power, and a local sample file before tuning network playback. Do not buy the board on the assumption that it will reproduce every subscription app or a Fire TV Stick’s certification.
FAQs
Can a Raspberry Pi 5 run Kodi?
Yes. LibreELEC currently lists a separate Pi 5 image containing Kodi. Select that image for your board and follow its stable-release instructions. OSMC’s current download list does not include Pi 5, so do not use an OSMC Pi 4 image as a substitute.
Is LibreELEC or OSMC better for a Raspberry Pi 4?
Both projects list Pi 4/400 images. LibreELEC is a lean Kodi-focused system; OSMC offers its own installer and management layer. Compare their current release notes and support documentation, then choose based on the setup and maintenance style you prefer. Neither is a universal performance winner for every file.
Can I install Kodi on Raspberry Pi OS instead?
Kodi can be installed as software in some Linux distributions, but package versions and hardware acceleration depend on that distribution’s repository and configuration. This guide uses dedicated, board-specific media-center images because their maintainers publish explicit Pi compatibility. Follow your Raspberry Pi OS release’s package documentation if you need a general desktop as well.
Will Netflix or another paid service play in 4K?
Do not assume so. A Pi’s 4K HDMI output and HEVC decoding do not establish a subscription service’s approved DRM level, resolution, HDR availability, or add-on support. Check the service’s official device list for guaranteed features, and treat Kodi integrations as separate, changeable projects rather than certified apps.
Can I use my television remote with Kodi?
Often, if your TV and HDMI path support CEC. Enable the feature in the TV’s settings, connect the Pi, then test navigation in Kodi. A receiver or switch may interrupt commands. A USB keyboard or compatible network remote can provide a fallback while you diagnose the CEC chain.
What if I only need Kodi on a TV I already own?
Check your television platform and existing streaming device before purchasing Pi hardware. Some systems have a supported Kodi installation route, while others need a separate HDMI device. Our Kodi for Android TV guide covers a different, app-based route when you already have a compatible Android TV device.